How to Start Yoga: A Beginner's Roadmap for 2026
Learn how to start yoga with a practical beginner's roadmap covering style selection, first poses, studio etiquette, and safety tips.
Written by Editorial Team
You're standing outside a yoga studio, hand on the door, wondering whether everyone inside already knows how to balance, breathe, and fold themselves into shapes you can't name. Maybe you've watched a few videos, bought a mat, and still haven't started because choosing a class feels harder than doing the practice.
That hesitation is normal. Yoga is accessible to beginners, and one global summary reports that 37% of yoga practitioners identify as beginners (RunRepeat's yoga statistics summary). You aren't arriving late to an advanced community. You're joining a practice with a large beginner population and a long history of adapting to different bodies, goals, and lifestyles.
The practical question isn't whether you're flexible enough. It's which style matches your reason for starting, which format fits your life, and how to practice without rushing. Once those decisions are clear, your first month becomes much simpler.
Rolling Out Your Mat: Why Starting Yoga Feels Harder Than It Is
A new student often enters a studio, chooses a spot near the back, and watches everyone else unpack their props with apparent confidence. They may recognize none of the Sanskrit names, worry about holding up the class, and wonder whether the teacher will notice that they can't touch their toes.
A good beginner class doesn't require you to arrive prepared. The teacher should explain how to set up, demonstrate transitions, offer alternatives, and make it clear that resting is part of practice rather than a mistake. Your job is to pay attention to your breathing, stay within a manageable range of motion, and ask for help when a cue doesn't make sense.
Yoga's accessibility comes from a long process of change. Early references appear in the Rig Veda around 1500 BCE, while the Upanishads developed yoga's inward focus between 800 and 200 BCE. Patanjali's Yoga Sutras, written roughly between 400 BCE and 400 CE, organized yoga into an eight-limbed path that still influences how teachers introduce breathing, concentration, and posture (history of yoga overview).
Practical rule: Your first class isn't an audition. It's an information-gathering session for your body.
Modern beginner classes often emphasize approachable postures, breath-synchronized movement, and gradual progression. That format reflects yoga's evolution from meditation-centered traditions into physical practices that can serve people with different levels of mobility and experience.
This roadmap focuses on the decisions that prevent most early frustration:
- Goal matching: Choose a style based on stress, flexibility, strength, pain management, or mental well-being.
- First practice: Learn breathing, alignment, foundation poses, and a short routine.
- Learning format: Compare studio instruction, home practice, and hybrid approaches.
- Safety and etiquette: Know what to bring, what to say, and when to reduce intensity.
- Local discovery: Use a curated directory to compare nearby studios before booking.
- Progression: Follow a realistic first-week schedule and recognize when to advance.
You don't need a perfect plan before you begin. You need a modest one you can repeat.
Choosing Your Yoga Style and Matching It to Your Goals
The wrong first class can make yoga feel ineffective or exhausting. A vigorous flow may be a poor introduction for someone seeking calm, while a long-hold class may frustrate someone who wants rhythmic movement. Choose by intended experience, not by the most impressive pose shown in a studio's social media feed.
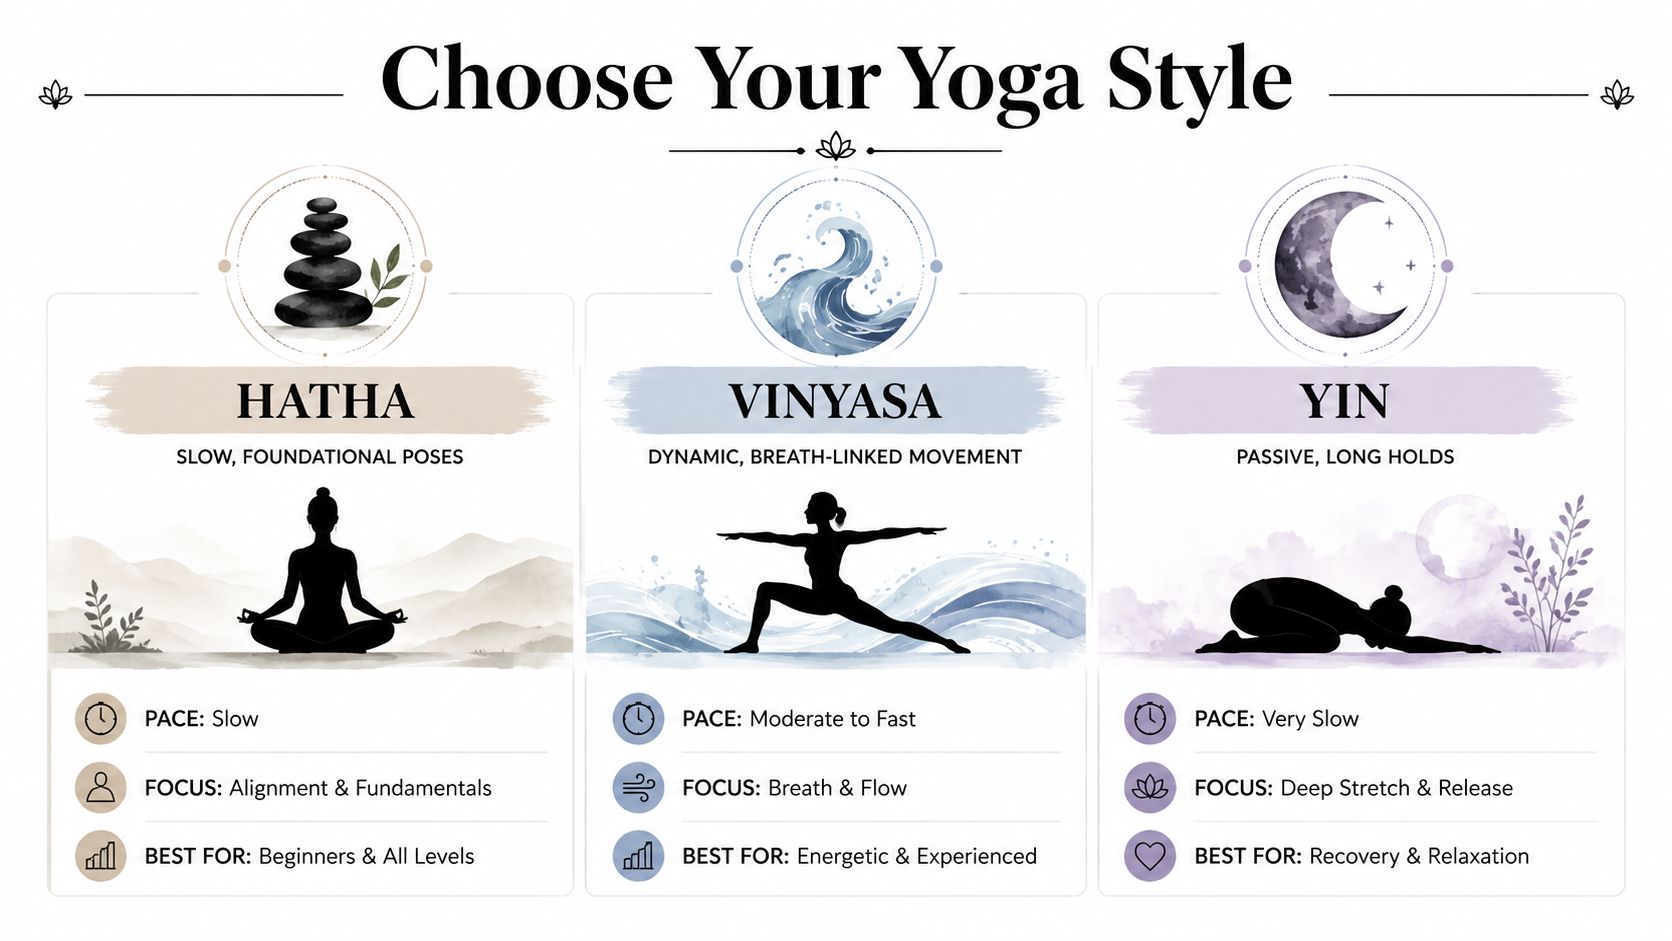
Match the style to the outcome
| Style or format | What a first class usually feels like | A sensible reason to choose it |
|---|---|---|
| Hatha | Measured instruction, foundational poses, and pauses to adjust your alignment | You want a clear starting point, steady mobility work, or a slower introduction |
| Vinyasa | Continuous movement linked to breathing, with fewer long pauses | You enjoy rhythm and want to build movement confidence and general strength |
| Yin | Supported, mostly passive positions held for longer periods | You want quiet, reflection, or a less athletic approach to mobility |
| Restorative | Heavily supported shapes with an emphasis on ease and downshifting | Stress relief is your primary goal and vigorous exercise feels counterproductive |
| Chair yoga | Seated and standing movements adapted around a chair | Balance, joint comfort, limited mobility, or confidence makes floor work difficult |
| Online or hybrid classes | Guided practice at home, sometimes combined with occasional in-person instruction | Your schedule, location, or anxiety makes a studio difficult at first |
If flexibility is your priority, Hatha or a gentle Vinyasa class gives you repeated exposure to basic movement patterns without requiring advanced range of motion. Flexibility develops through patient, regular practice, not by forcing a deeper position on the first day.
For stress relief, restorative or Yin may be a better match than a demanding flow. These formats give you more time to notice your breath and reduce the pressure to perform. If stillness makes you restless, gentle Hatha can provide enough movement to help you settle.
For strength, choose a class that includes supported weight-bearing positions and gradual transitions. A beginner Vinyasa class may suit you, but confirm that the description says beginner or foundational rather than assuming every flow class is appropriate.
Pain management requires more care. Yoga may support movement confidence, but pain can have many causes, and a general class shouldn't replace medical assessment or individualized instruction. Consider chair, therapeutic, restorative, or private instruction, and tell the teacher exactly where you hurt and which movements aggravate it.
Choose one primary style and one backup option. Constantly switching classes makes it harder to learn whether the method is helping.
Start with the format that makes attendance easiest. A theoretically ideal class you avoid won't help as much as a suitable class you can approach consistently.
Your First Practice: Breath, Foundation Poses, and a Starter Routine
A beginner session needs three anchors: breath, stable positions, and simple transitions. You don't need a large pose library. You need enough control to recognize when you're working productively and when you're pushing past useful effort.
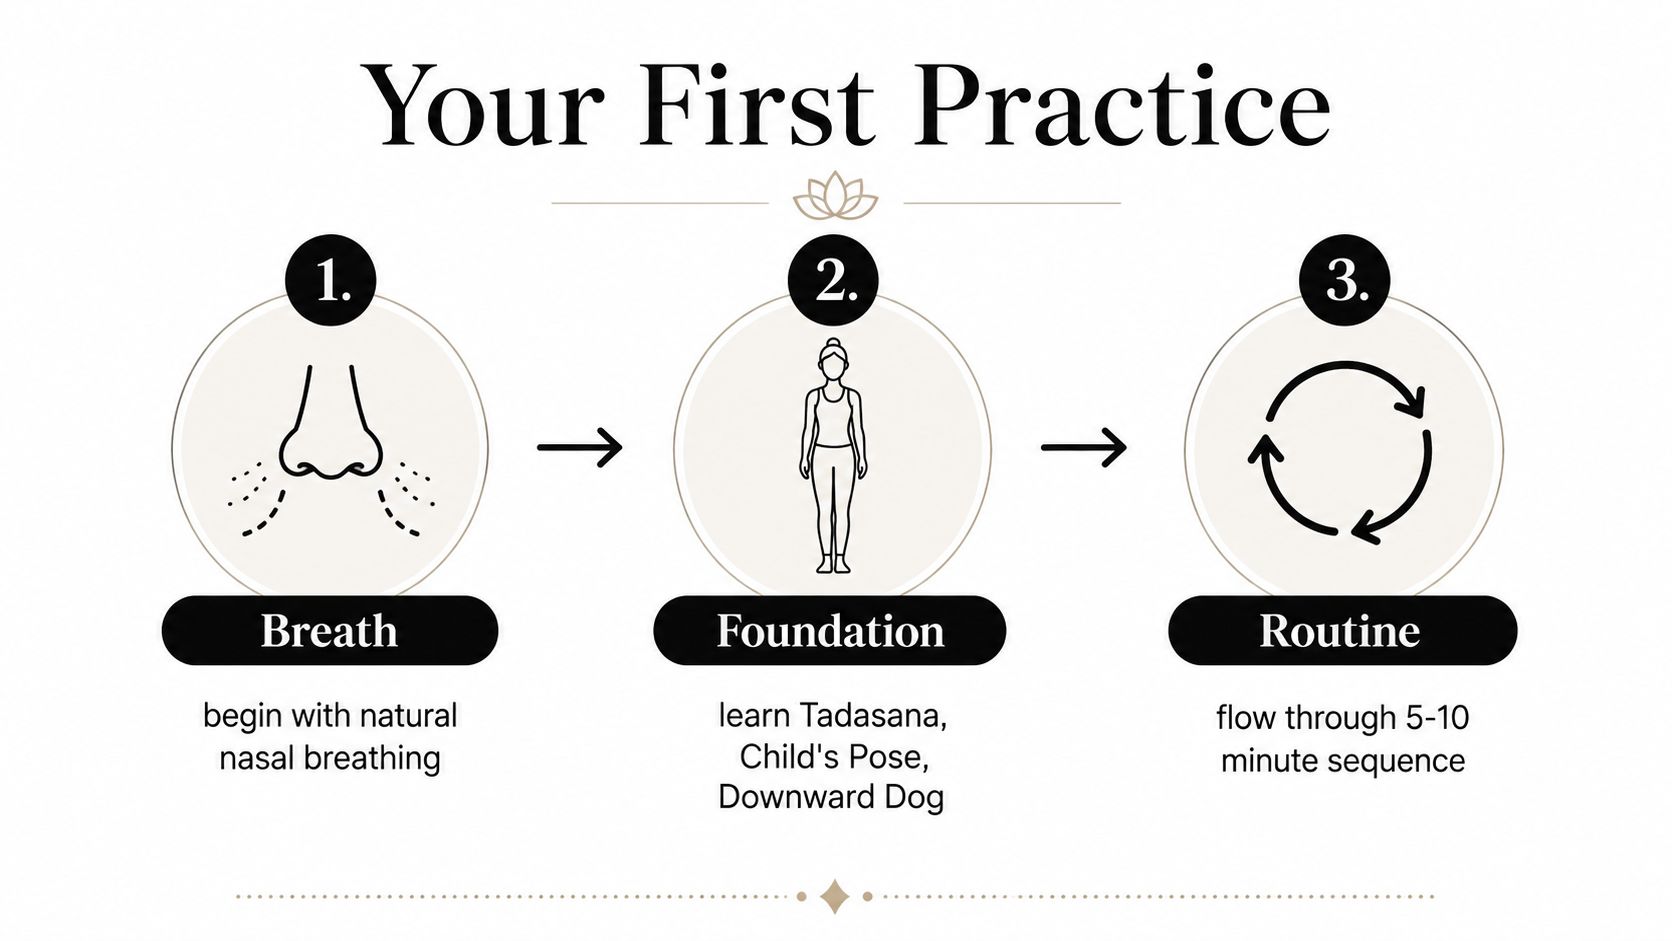
Use breathing as your pacing tool
Begin with natural nasal breathing if your nose is clear. Let the inhale arrive without strain and make the exhale smooth. If you can't maintain calm breathing, reduce the range of motion, slow down, or rest.
Nasal breathing isn't a contest. Don't force it through congestion or discomfort. It's a useful way to notice whether your effort matches your current capacity.
Learn three foundation poses
Mountain Pose, or Tadasana: Stand with your feet comfortable rather than forcing them together. Let your knees stay soft, lengthen through the crown of your head, relax your shoulders, and keep your ribs from thrusting forward. Take 3–5 easy breaths, noticing whether your weight is balanced between both feet.
Cat-Cow: Come to hands and knees, placing your hands under or slightly ahead of your shoulders if that feels better. On an inhale, gently lengthen the front of your spine. On an exhale, round only as much as your neck and back allow. Move slowly for several cycles, and don't collapse into your shoulders or force the spine into a dramatic shape.
Child's Pose: Bring your hips toward your heels only as far as comfortable, widening your knees or placing a cushion beneath your hips if needed. Rest your forehead on a block, stacked hands, or a folded towel. If this position pinches your knees, hips, or back, choose a supported lying position instead.
The aim is not to imitate a photograph. The aim is to find a version of each shape that lets you breathe without bracing.
A complete 20-minute starter routine
- Arrive, 2 minutes: Sit or lie down. Notice your breathing and release unnecessary tension in your jaw and hands.
- Warm up, 3 minutes: Move through Cat-Cow slowly, then shift your hips back toward Child's Pose or another comfortable rest.
- Stand, 3 minutes: Come to Mountain Pose. Add slow arm raises with an inhale and relaxed arm lowers with an exhale.
- Fold gently, 2 minutes: Hinge from the hips into a soft forward fold. Bend your knees generously and keep your hands on your thighs, blocks, or the floor.
- Low lunge, 4 minutes: Step one foot forward and lower the back knee. Keep the front knee comfortable, use your hands for support, and take several breaths on each side.
- Supported Downward Dog, 2 minutes: From hands and knees, lift your hips only if your shoulders, back, and breathing remain steady. Bend your knees and shorten your stance.
- Floor sequence, 2 minutes: Lie on your back for a gentle knee-to-chest movement, followed by a comfortable twist on each side.
- Rest, 2 minutes: Lie down with your arms relaxed. Let the practice end without immediately checking your phone.
Independent guidance recommends a low-dose plan of 2–3 sessions per week for about 10–20 minutes, with short, repeatable practice preferred over occasional long sessions (beginner yoga practice guidance). Beginner outcomes in trials are commonly assessed over 8–12 weeks, and a review of randomized studies in sedentary adults found improvements in flexibility, strength, balance, and cardiorespiratory fitness after that period (beginner yoga practice guidance).
For sleep-focused breathing ideas, you can also explore this guide to breathwork for sleep, then keep your yoga practice gentle enough that it supports rest rather than stimulating you.
The video below can help you see how a guided beginner sequence is paced.
After the routine, ask one question: Could I repeat this without dreading it? If the answer is no, shorten it or remove the most demanding movement.
Studio Classes versus At-Home Practice: Picking Your Learning Path
Studio and home practice solve different problems. A studio gives you external structure and a teacher who can respond to what you're doing. Home practice gives you control over time, privacy, and pace.
When a studio makes more sense
An in-person class is valuable if you're unsure about alignment, tend to lose motivation alone, or want immediate answers. A teacher can offer a block, change the setup, or suggest a different position when a movement doesn't suit you. The room itself also creates a boundary between practice and the rest of your day.
The trade-offs are practical. You'll need to travel, arrive on time, follow the studio's schedule, and pay the class fee. A busy or crowded class may also feel overstimulating, especially if anxiety is one reason you're starting.
Before booking, read the class description carefully. Look for beginner, foundations, gentle, restorative, chair, or all levels, and contact the studio if the wording is vague. A good question is, “Will the teacher offer alternatives for someone with no yoga experience?”
When home practice works better
At home, you can pause a video, repeat a transition, or rest without feeling watched. This makes online practice a useful entry point for people who feel self-conscious or whose schedules change frequently. It also removes the travel barrier, which can be the difference between practicing and skipping.
The weakness is feedback. A video can't see whether you're locking your knees, shifting too much weight into your wrists, or holding your breath. Use a modest class, keep the camera or screen positioned where you can see it without craning your neck, and avoid advanced tutorials until basic movements feel predictable.
| Your current constraint | More suitable starting path |
|---|---|
| You need accountability | Studio class or scheduled live online class |
| Your schedule changes often | Recorded home practice |
| You feel anxious in public | Home practice followed by a quiet studio class |
| You're managing an injury | In-person, private, or specialized instruction |
| You're unsure about form | Studio first, then home repetition |
A hybrid plan often gives beginners the best balance. Practice at home to learn the vocabulary, then attend a studio class for correction and confidence. For help thinking through pricing and class formats, see this guide to yoga class cost.
What to Bring, Studio Etiquette, and Staying Safe as a Beginner
Your first class can feel harder than the poses themselves if you arrive without a plan. Pack for comfort, learn the room's basic rules, and tell the teacher what your body needs before practice begins. You do not need a collection of branded equipment.
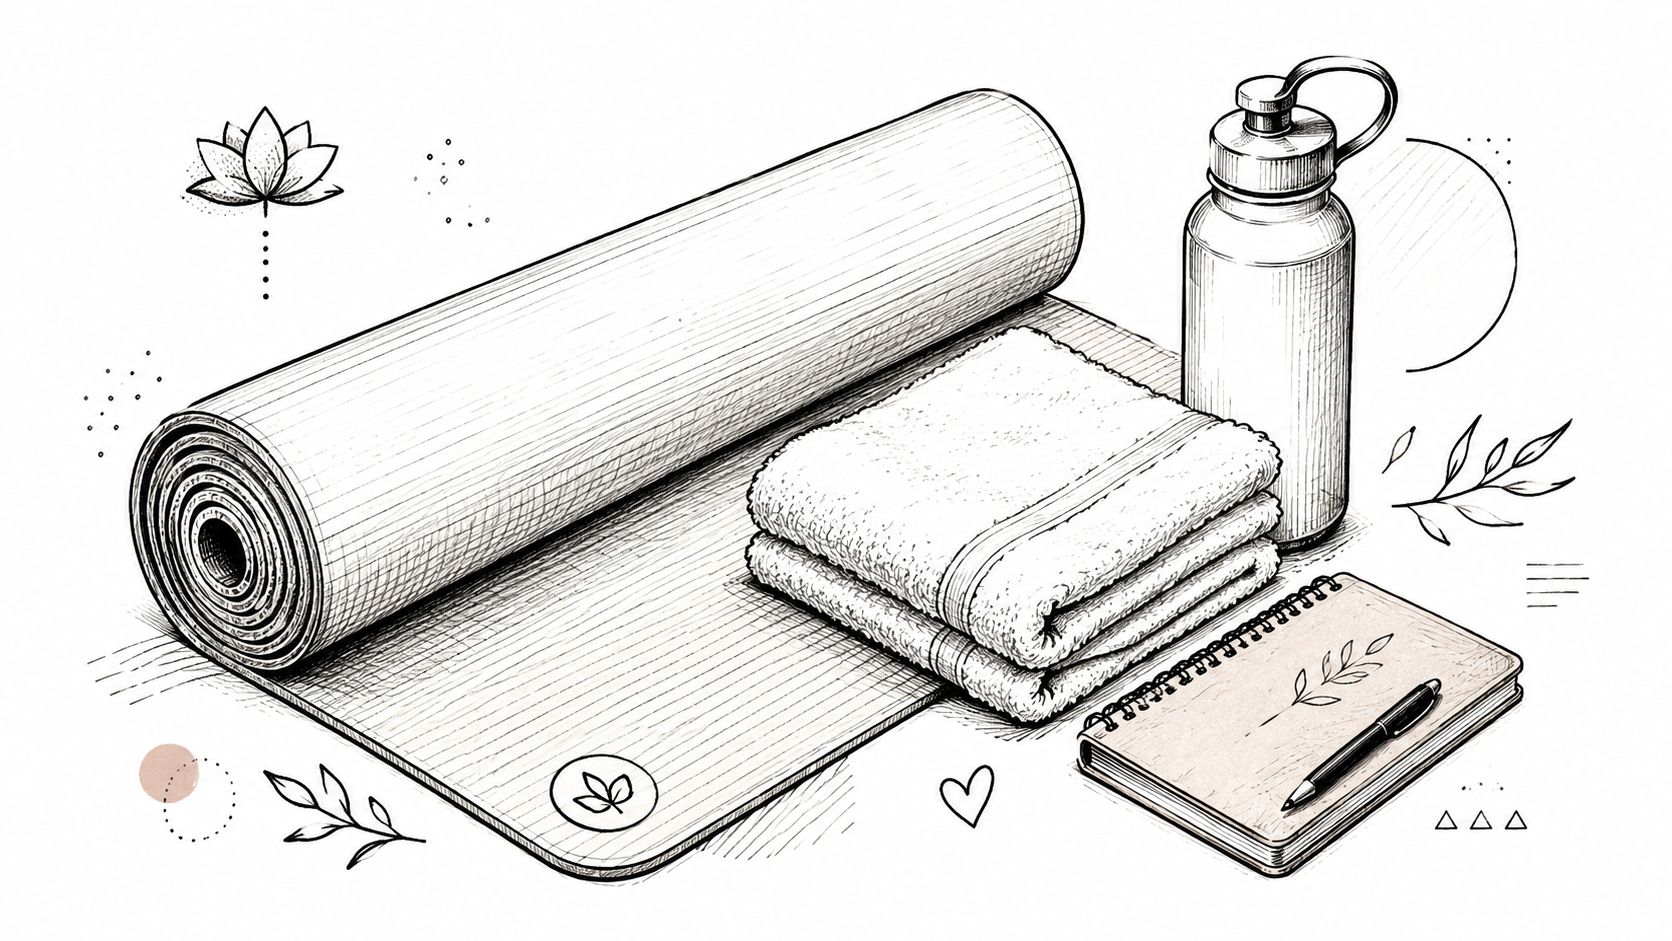
Pack for function, not appearance
- A basic mat: Choose one with enough traction to prevent sliding. Ask the studio whether mats are available before carrying your own.
- Comfortable clothing: Wear clothes that let your hips, shoulders, and knees move without constant adjustment. Avoid very loose tops that fall over your face during folds.
- Water: Bring a bottle, especially for a warm room or a class with continuous movement.
- A small towel: Use it under your head, beneath a knee, or for extra grip.
- Optional props: A block or strap can reduce strain and bring the floor closer. At home, a book or belt may work, but only use stable substitutes that cannot slip.
Arrive about ten minutes early. Check in, use the restroom, choose a place, and tell the teacher you are new. Remove shoes where the studio directs, silence and put away your phone, and avoid strong scents that may distract nearby students.
Before class, mention an injury, pregnancy, recent surgery, or any movement that causes pain. A long medical history is unnecessary. “Deep knee flexion bothers me” gives the teacher information they can use to offer a modification.
Replace the three common beginner mistakes
Forcing end-range stretches. A strong sensation is not automatically progress. Stop if you feel sharpness, pinching, numbness, or a change in breathing. Bend your knees in forward folds and use props to maintain length without pulling aggressively.
Skipping the warm-up. Deep positions feel harsher when your body has not had time to move. Begin with joint-friendly motion, Cat-Cow, walking, or gentle standing patterns before asking for more range.
Attempting advanced transitions too soon. Jumping between poses, deep inversions, and intense arm balances require more control than a new student usually has. Step instead of jump, keep one point of contact while learning balance, and repeat basic transitions until they feel predictable.
Yoga is generally considered low risk, but safety still depends on pacing. One systematic review summarized injury rates around 1.45 injuries per 1,000 hours of practice. A PubMed review also concluded that serious injuries are infrequent and the overall injury burden is low compared with many other physical activities (systematic review and injury evidence). A prospective cohort study reported a 10.7% incidence of musculoskeletal pain attributable to yoga over one year. Persistent pain is a reason to modify practice rather than push through it.
Pain that changes your movement or breathing is information. Reduce the load, change the shape, or stop and seek qualified guidance.
Before each class, ask four questions: Do I know the class level? Have I told the teacher what matters? Can I breathe comfortably? Do I have a way to modify the pose? Those checks prevent more problems than expensive gear.
Finding the Right Studio Near You with Lucidoura
Once you know your preferred style and learning format, local discovery becomes a filtering task rather than an open-ended search. Start with your practical limits, including how far you're willing to travel, what times you can attend, and whether you need amenities such as changing rooms, props, or accessible facilities.
Lucidoura is a curated directory of wellness businesses that includes yoga and meditation studios. Its organized categories, city filters, tags, and concise place summaries help you narrow options without sorting through unrelated local-search results.
Use a repeatable studio search
- Choose your city: Begin with the location where you'll practice, not the city you work in unless that's where your schedule allows attendance.
- Open the yoga category: Review studios that identify yoga as a primary offering, then separate general studios from meditation, breathwork, or sound-healing spaces.
- Read the summary: Look for clues about modalities, class types, and amenities. A listing that mentions restorative, Hatha, chair, or beginner classes may be more relevant than one that only showcases advanced flows.
- Compare practical details: Check distance, schedule, studio environment, and whether the place appears suited to your comfort level.
- Confirm before booking: Visit the studio's own website or contact the venue to verify current class times, policies, accessibility, and whether first-time students need to register in advance.
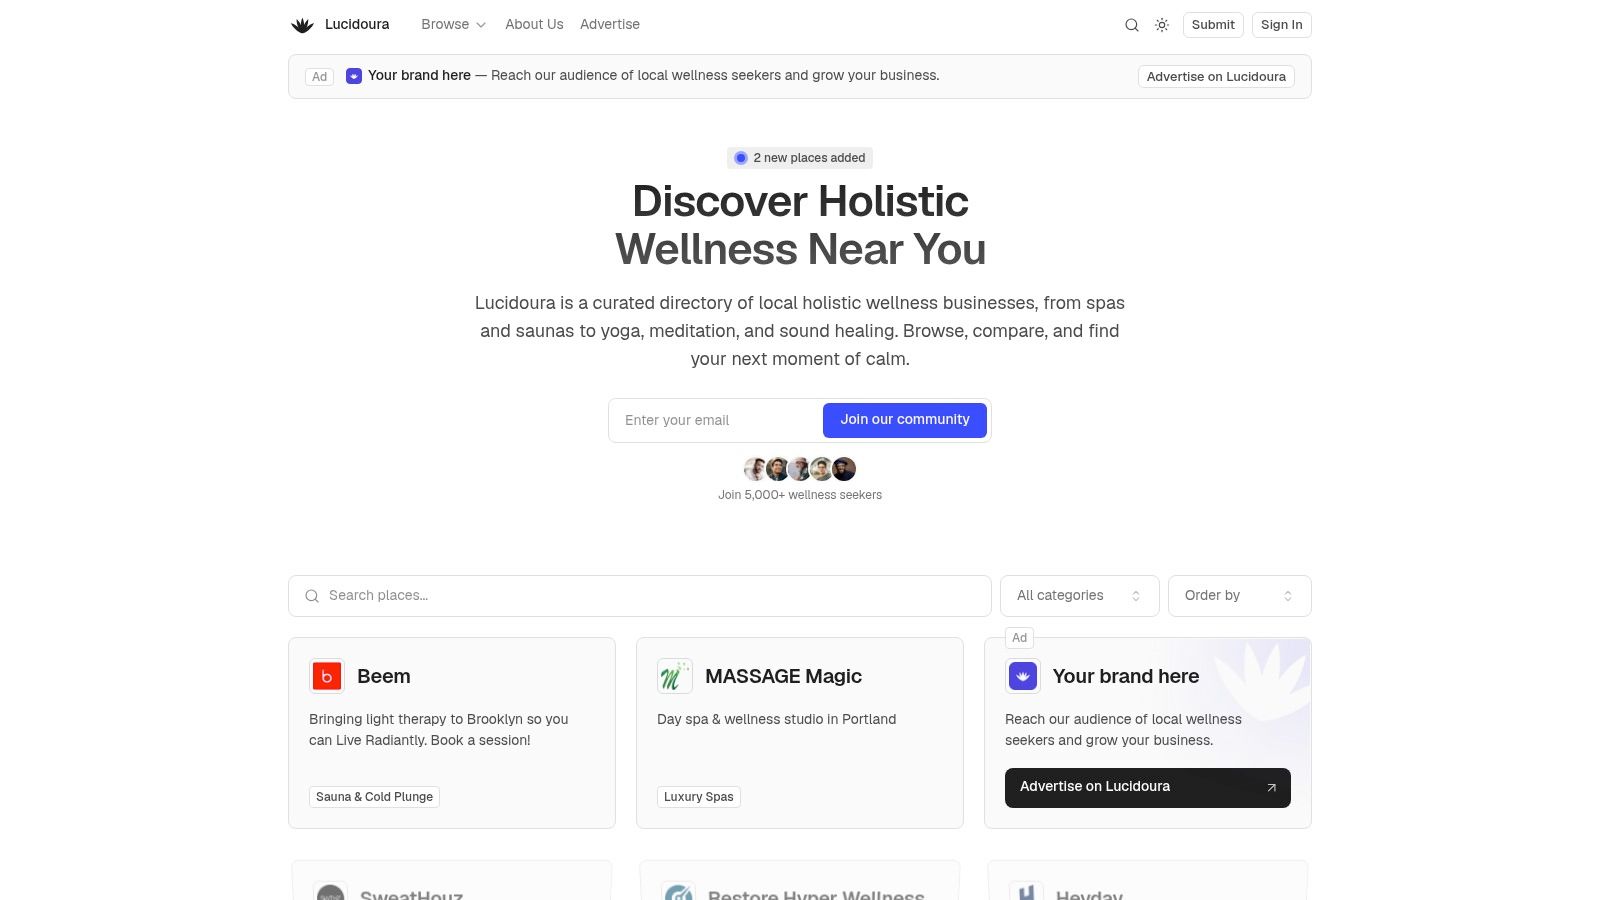
The value of a curated listing is consistency. Generic results often mix studios, marketplaces, advertisements, and outdated pages. A focused directory gives you a clearer first pass, while the studio remains the authority for its current policies and schedule.
If you're searching specifically for local options, use this guide to find yoga studios near you. The same workflow can support later searches for meditation, sound healing, breathwork, or other wellness spaces as your interests develop.
A useful comparison note should answer three questions: Would I feel comfortable entering this place, can I reach it reliably, and does its teaching style fit my goal? If a listing doesn't answer those questions, contact the venue before committing.
Your First Week Plan and When to Level Up
Make your first week small enough that ordinary life can't easily derail it. Choose one style, one main practice location, and one backup option. Your schedule should remove decisions, not create another project.
A simple seven-day start
- Day one: Complete the 20-minute starter routine at home, or take a beginner class if you've already chosen a studio.
- Day two: Rest. Notice how your body feels during ordinary movements, without testing your flexibility.
- Day three: Repeat a shorter home session focused on breathing, Mountain Pose, Cat-Cow, and a comfortable rest.
- Day four: Attend a studio class, watch a beginner video, or take a live online class. Write down one cue that helped.
- Day five: Rest or walk gently.
- Day six: Repeat the routine and make one modification based on what you learned.
- Day seven: Review your experience. Decide whether the style, teacher, location, and schedule are realistic enough to keep.
Stay with the same general approach until attendance feels stable. Then add time or complexity gradually, not both at once. A beginner may be ready for a more demanding class when breathing remains controlled, basic transitions feel familiar, and the next-day response is manageable.
Slow down if pain persists, your technique deteriorates, you hold your breath, or you feel pressure to compete with the room. Rest isn't a failure of progression. It's part of learning how to regulate effort.
The best first month is rarely the most ambitious one. It's the month in which your chosen goal, class format, schedule, and safety habits fit together well enough for you to return.
Use Lucidoura to browse curated yoga and wellness venues by city, category, and practical details before you book. Start by comparing a few nearby studios that match your preferred style, then choose the one you can attend consistently and contact it to confirm beginner availability.